Receive Microsoft 365 Service Announcements in Teams using Power Automate
How to receive Microsoft 365 Service Announcements in Teams using Power Automate

Introduction
Here I am, my very first post on my blog. I hope you will enjoy reading it as much as I enjoyed writing it.
As an IT professional, I am always looking for ways to automate tasks. In this post, I will show you how to receive Microsoft 365 Service Announcements in Teams using Power Automate. We will create an app registration in Entra ID and use the Microsoft Graph API to get the service announcements using Power Automate. Then we will send the service announcements to a Teams chat on a daily basis.
Prerequisites
- Microsoft 365 subscription
- Power Automate Premium license
You need a Power Automate Premium license to use the HTTP action in Power Automate. You can get a Power Automate Plan 2 trial license for 90 days to get started. I will show you how to get the trial license later in this post.
Step 1: Create an app registration in Entra ID
- Go to the Entra ID portal and sign in.
- Click on App registrations in the left menu in the submenu Applications.
Click on New registration.

Enter a name for the app registration, select Accounts in this organizational directory only, and click on Register.

- Click on API permissions in the left menu.
- Click on Add a permission.
- Select Microsoft Graph.
- Select Application permissions.
- Search for ServiceMessage.Read.All and select it.
Click on Add permissions.
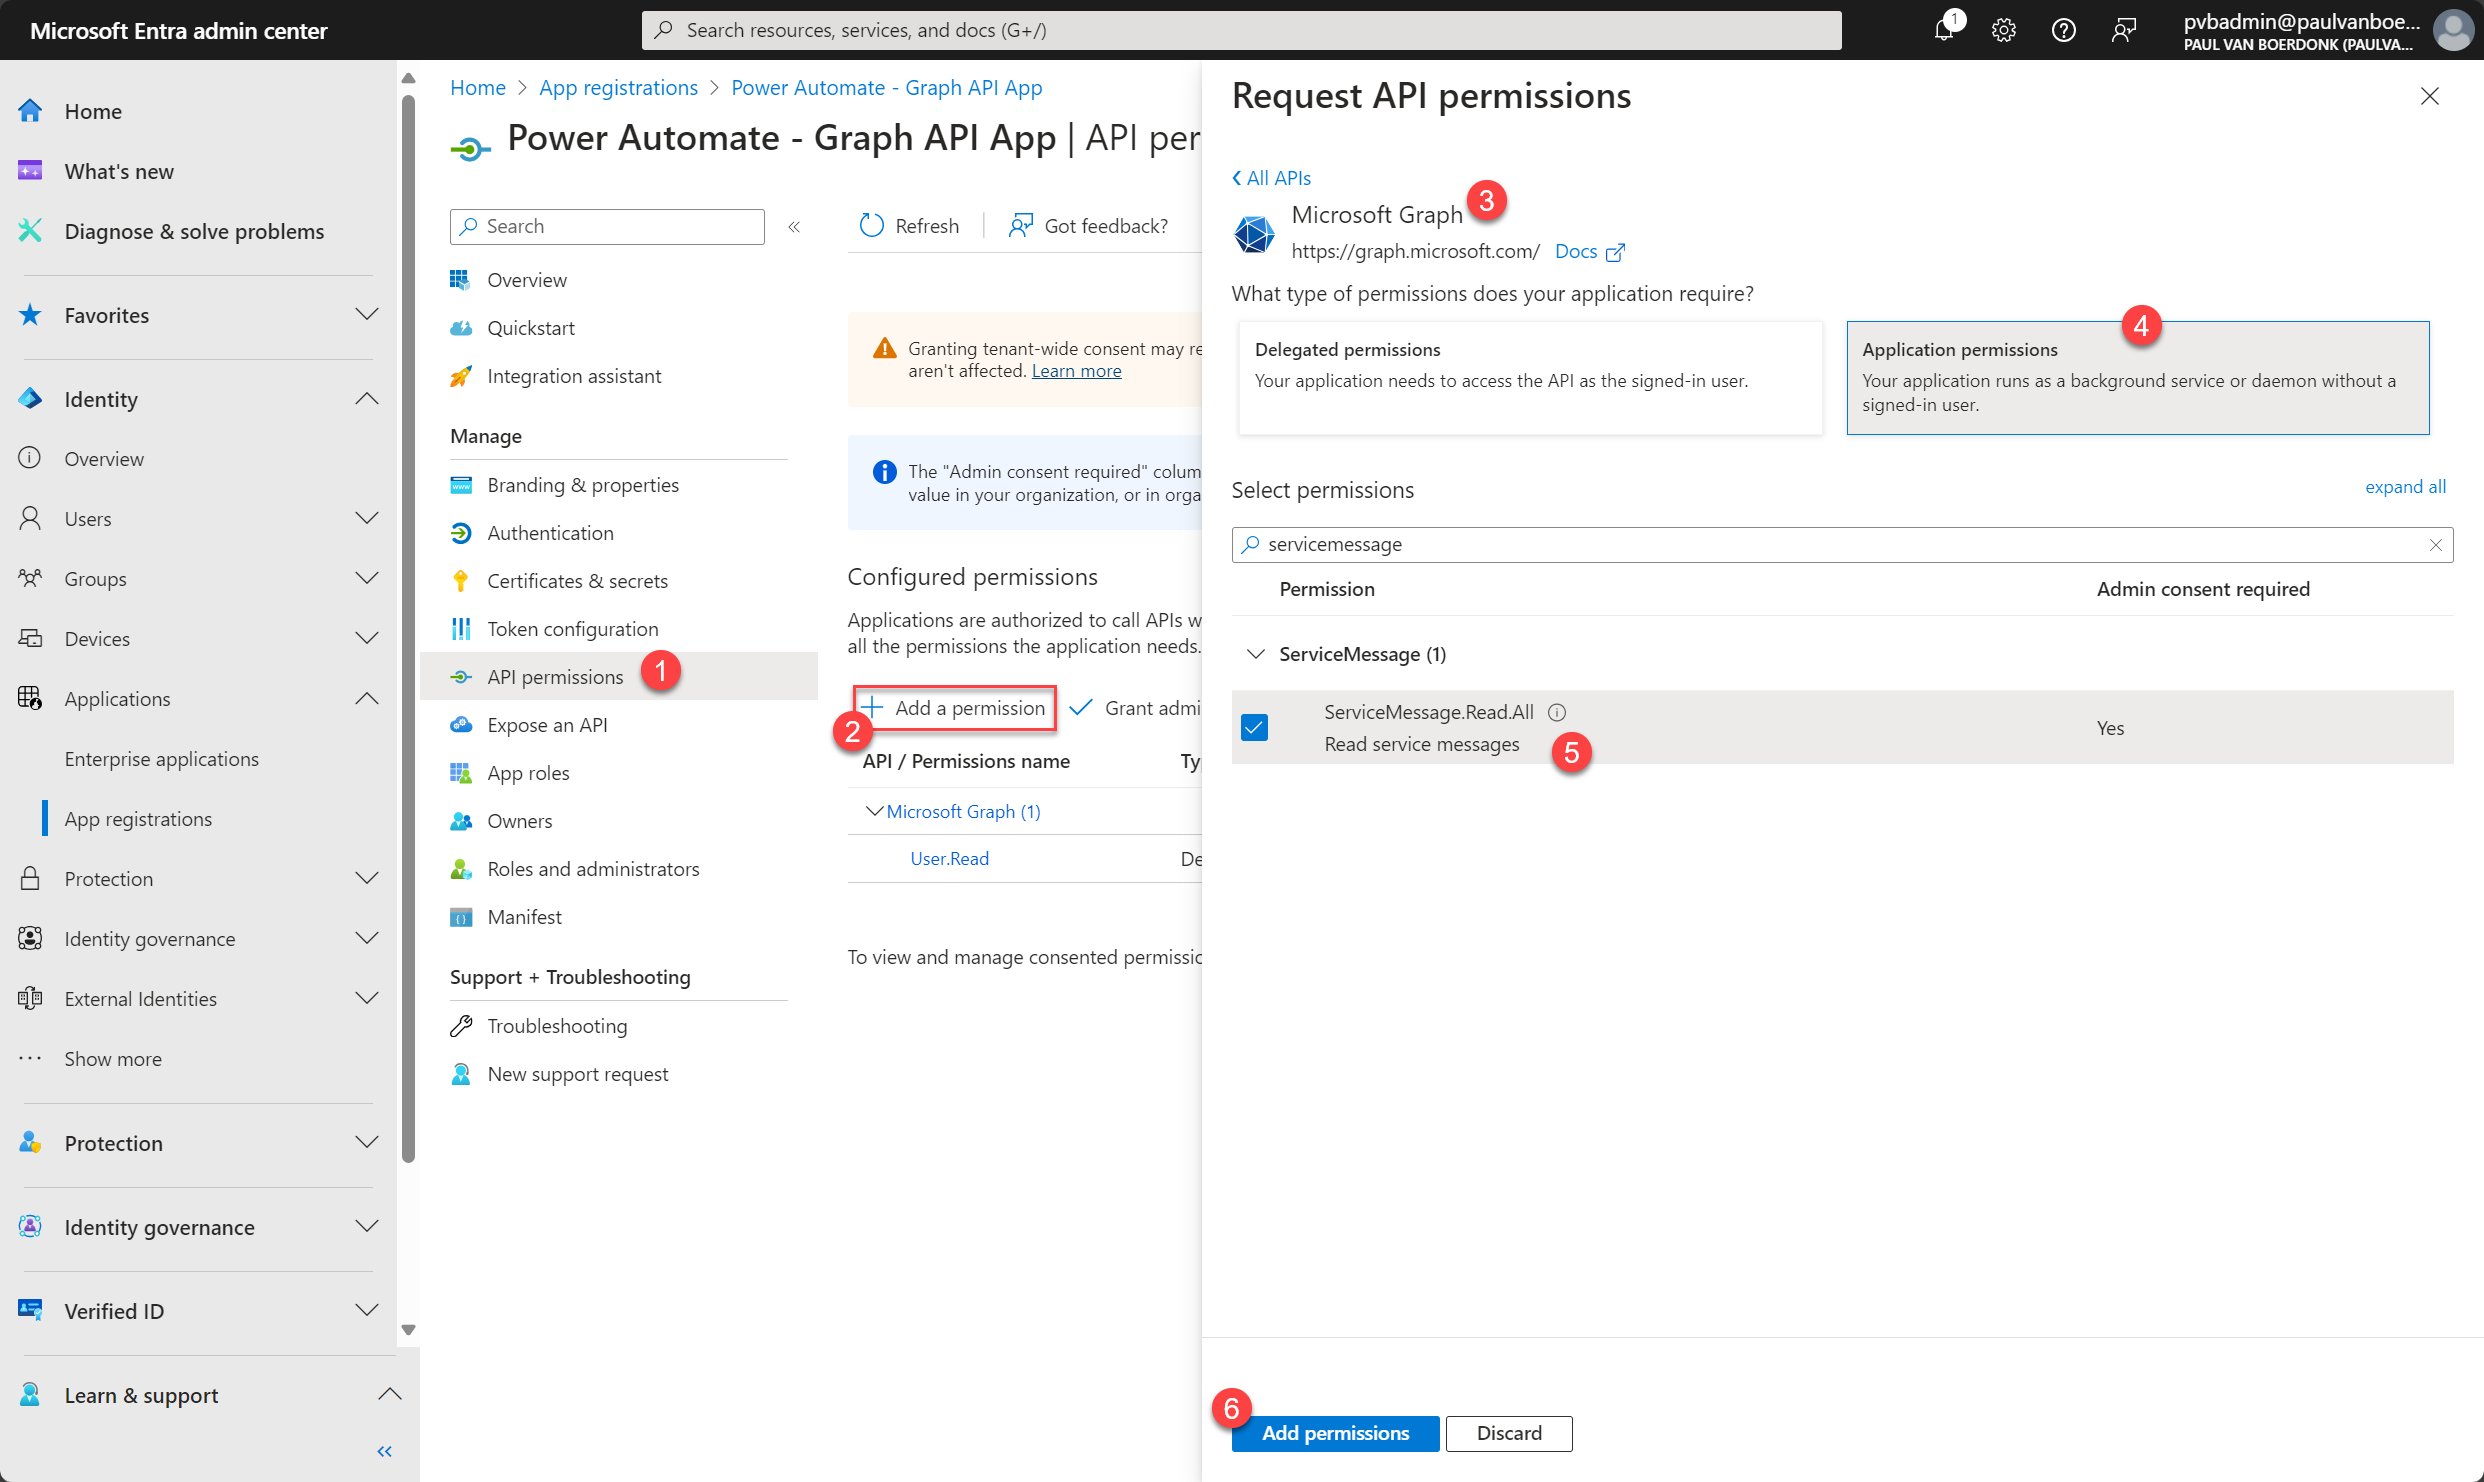
Click on Grant admin consent for {your organization}.

- Click on Certificates & secrets in the left menu.
- Click on New client secret.
Enter a description for the client secret, select an expiration date, and click on Add.

- Copy the Secret value and save it in a secure location.
- Click on Overview in the left menu.
Copy the Application (client) ID and Directory (tenant) ID and save them in a secure location as well, we will need them later.

Step 2: Create a Power Automate flow and set variables
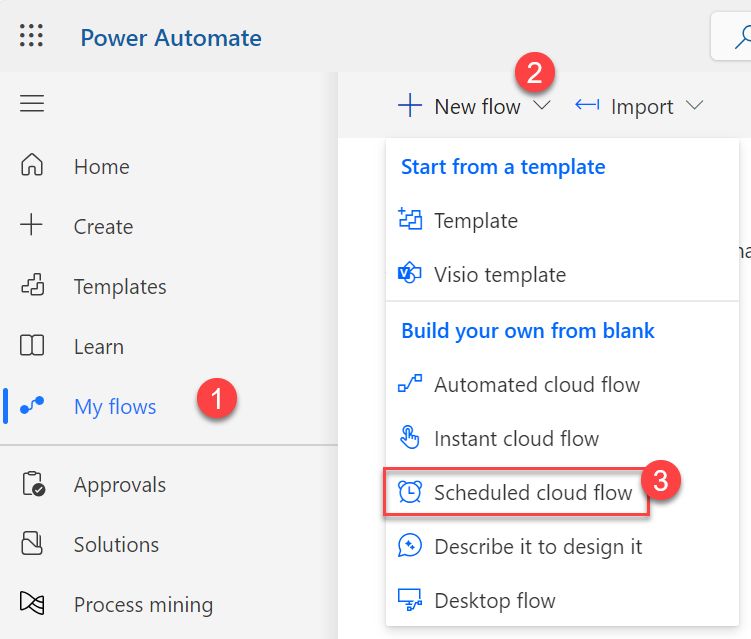
- Go to the Power Automate portal and sign in.
- Click on My flows in the left menu.
Click on New flow and select Scheduled cloud flow.
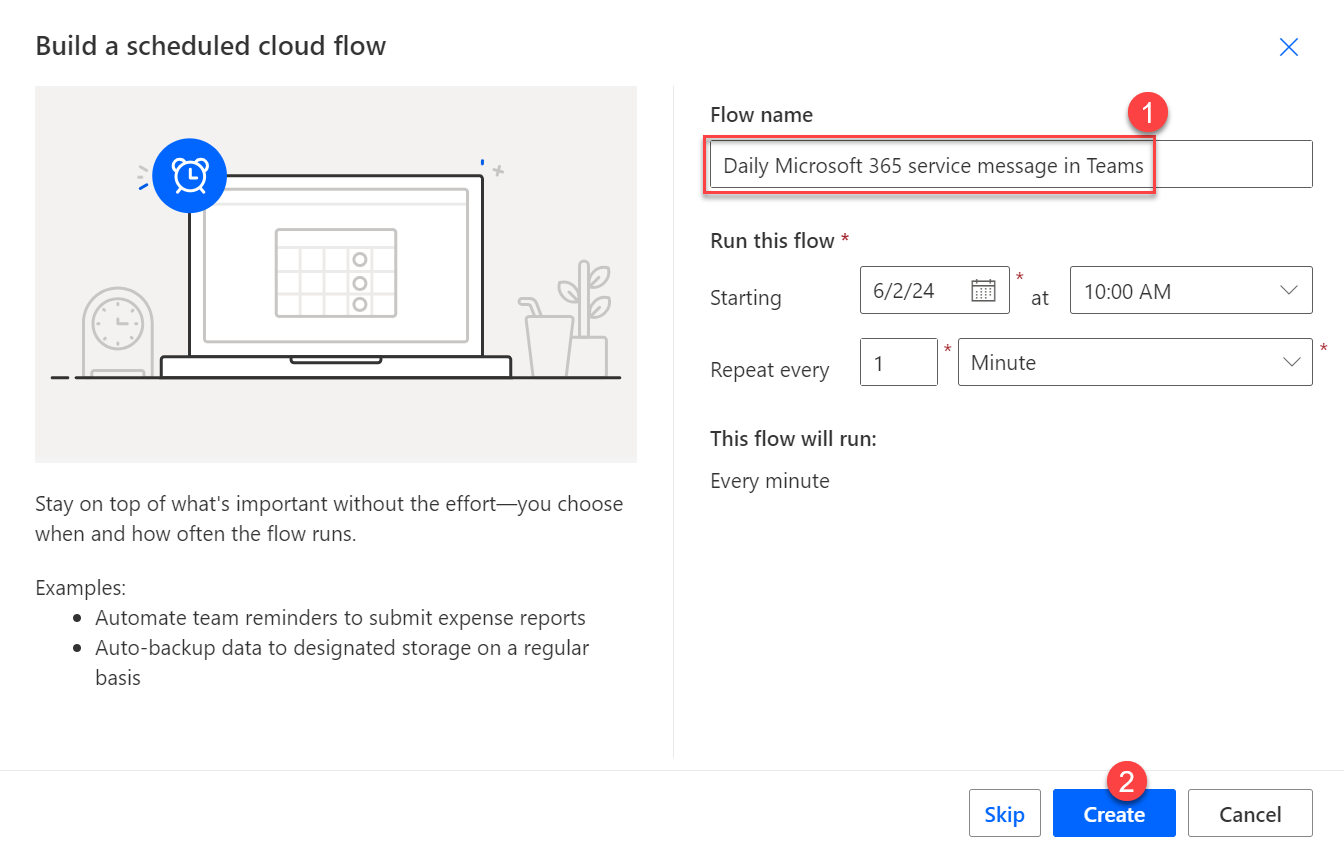
Enter a name for the flow and click on Create, we will finetune the frequency in the next step.
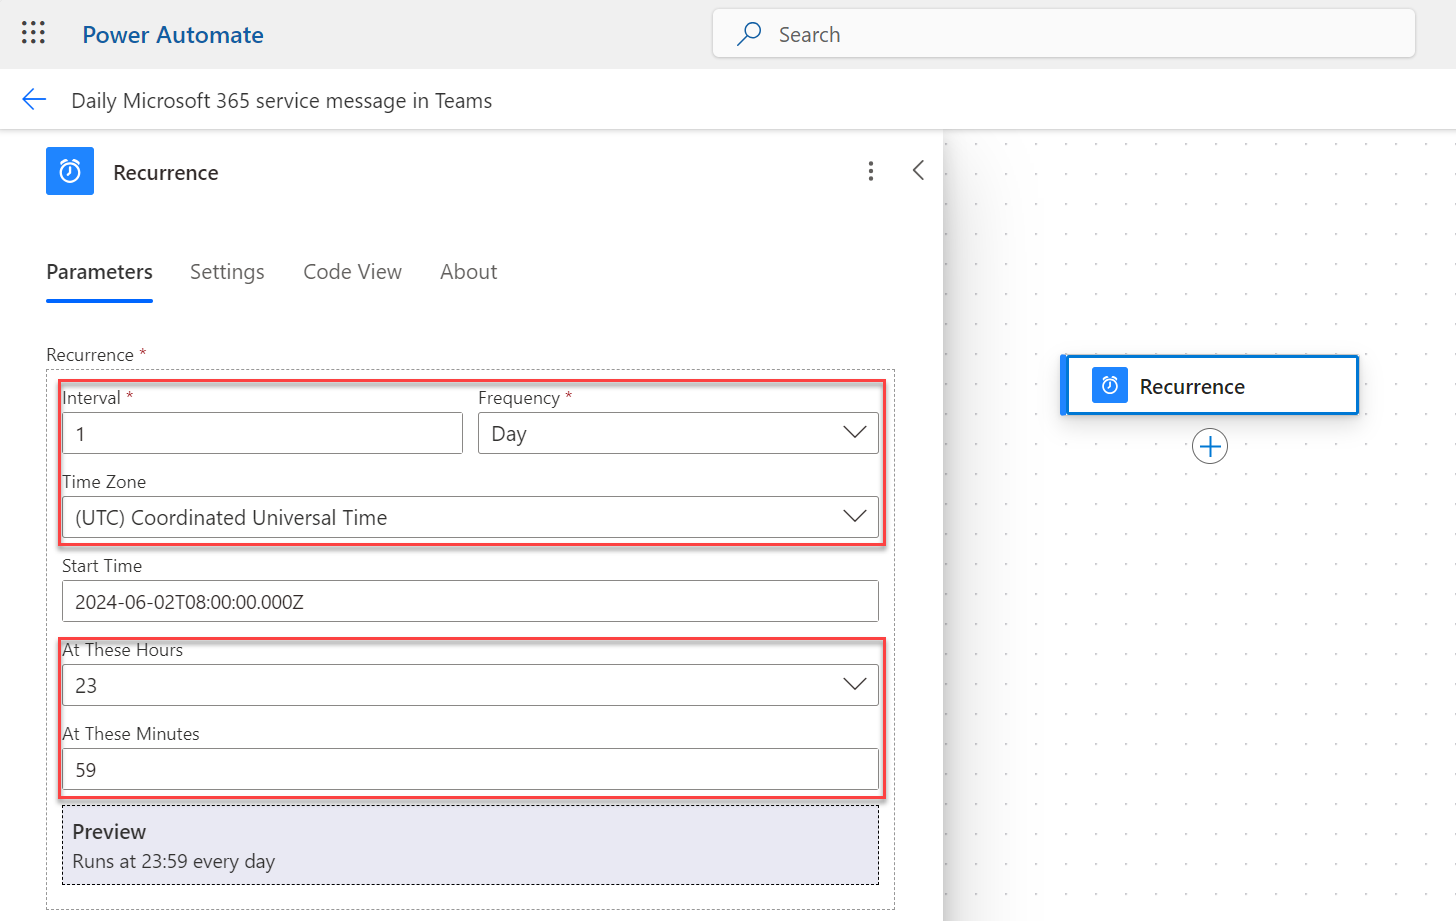
Click on Recurrence and set the frequency to Daily by selecting Interval: 1 and Frequency: Day.
- Now we will set the app_id, client_secret, and tenant_id as variables. Click on the + icon below the recurrence trigger to add an action.
Search for variable and select Initialize variable.
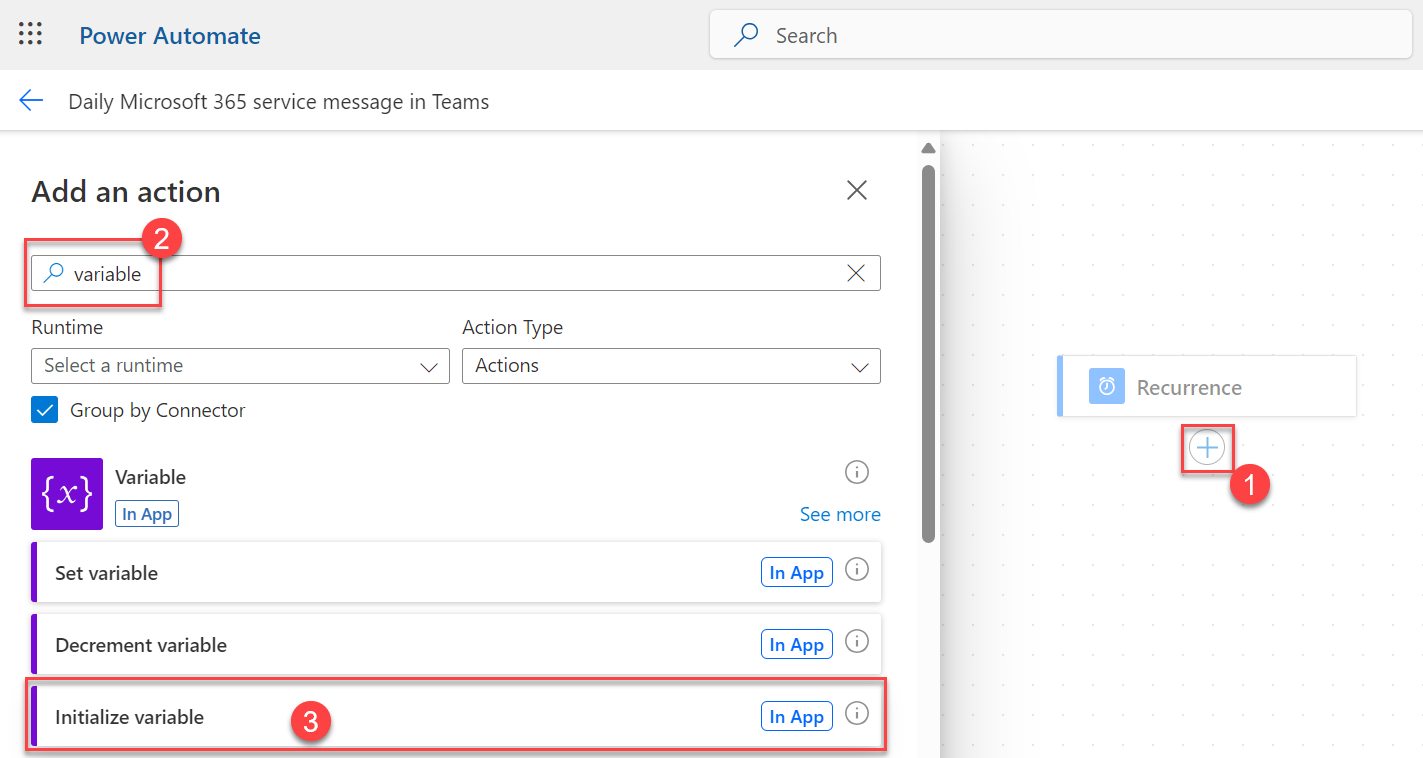
Enter app_id as the Name and the Application (client) ID from the app registration in Entra ID as the Value. Click on Create.
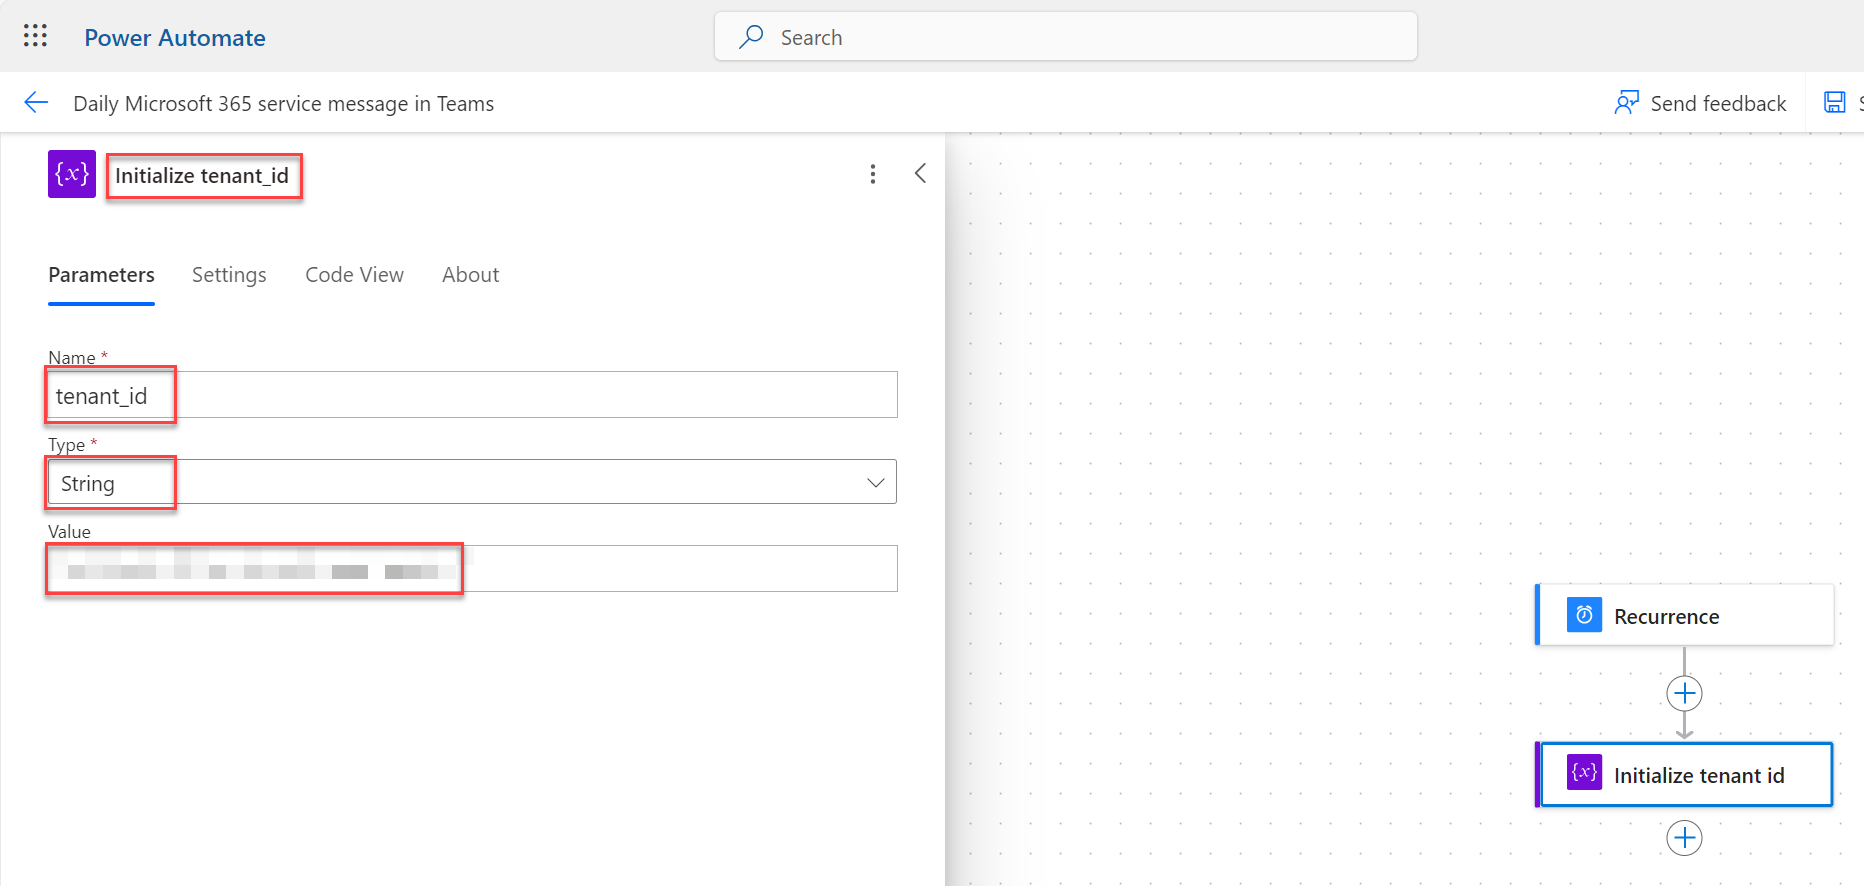
- Repeat the previous steps (6-8) to add the client_secret and tenant_id as variables.
Only use this approach for testing purposes. It is not recommended to store sensitive information in plain text. You should use a Key Vault or a secure storage solution to store the client secret. To do this, follow the steps in the Microsoft documentation.
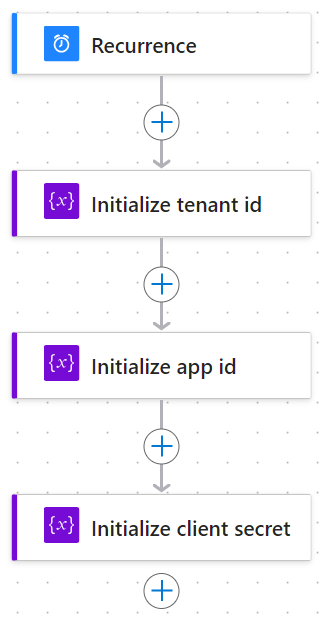
The flow should look like this:
Step 3: Get an access token
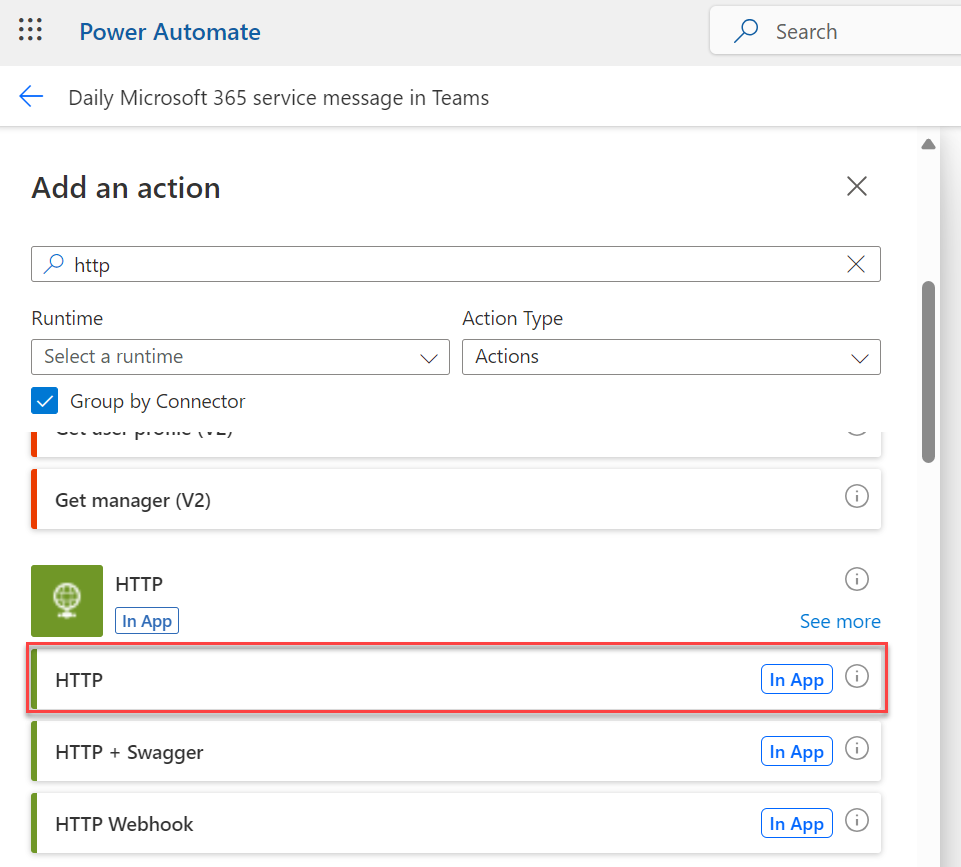
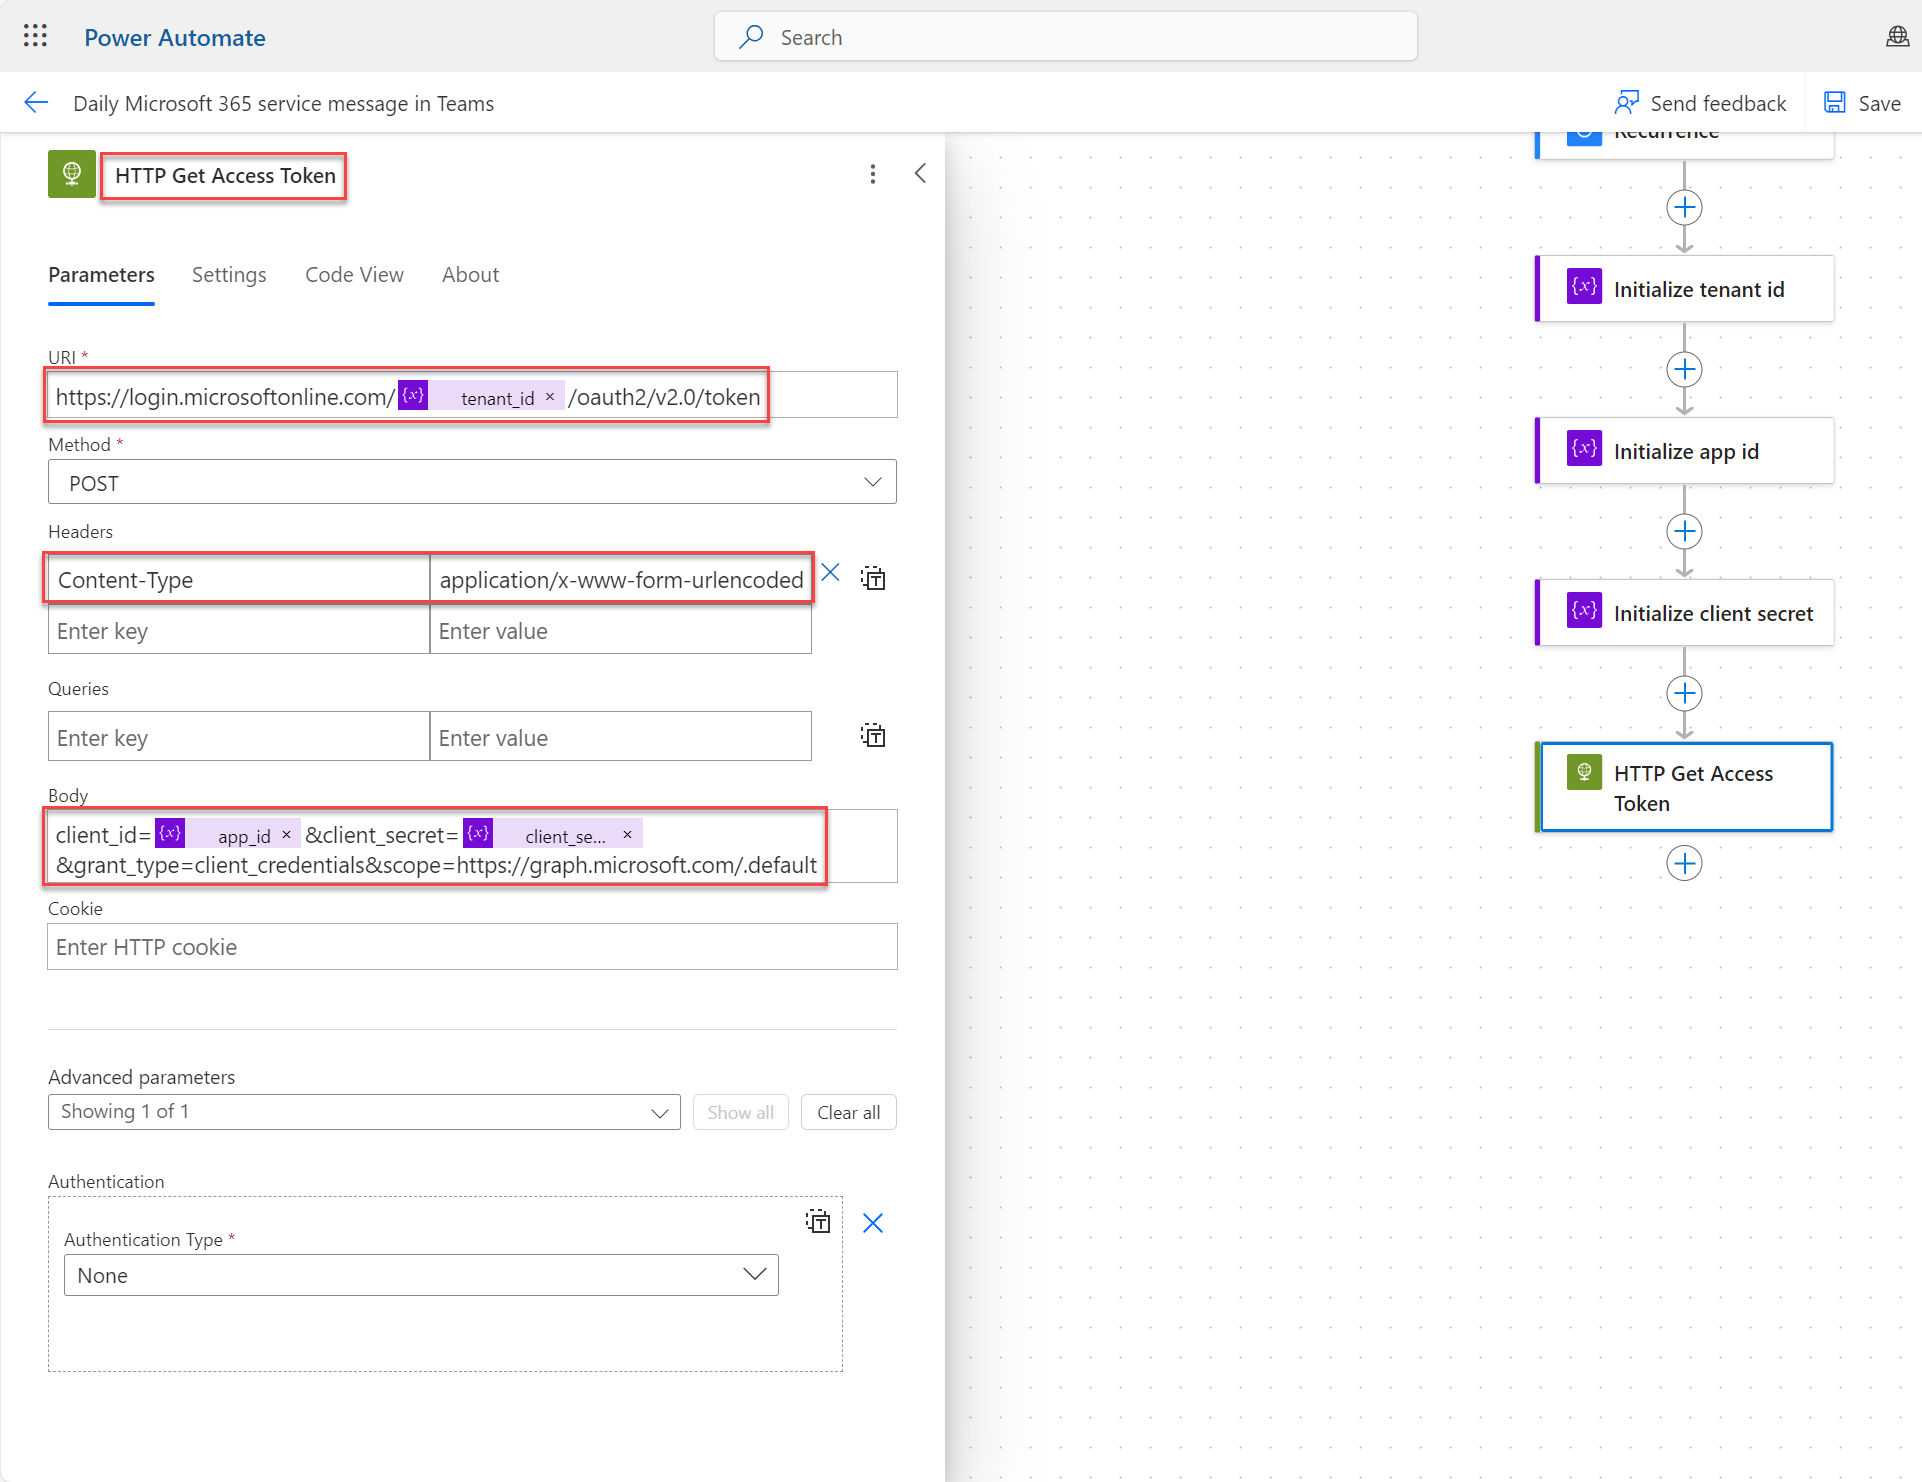
- Add an action below the last Initialize variable action by clicking on the + icon.
Search for HTTP and select HTTP.
Enter the following information:
- Uri:
https://login.microsoftonline.com/@{variables('tenant_id')}/oauth2/v2.0/token - Method: POST
- Headers:
- Content-Type:
application/x-www-form-urlencoded
- Content-Type:
- Body:
client_id=@{variables('app_id')}&client_secret=@{variables('client_secret')}&grant_type=client_credentials&scope=https://graph.microsoft.com/.default
- Uri:
(Optional) Get a Power Automate Plan 2 trial license
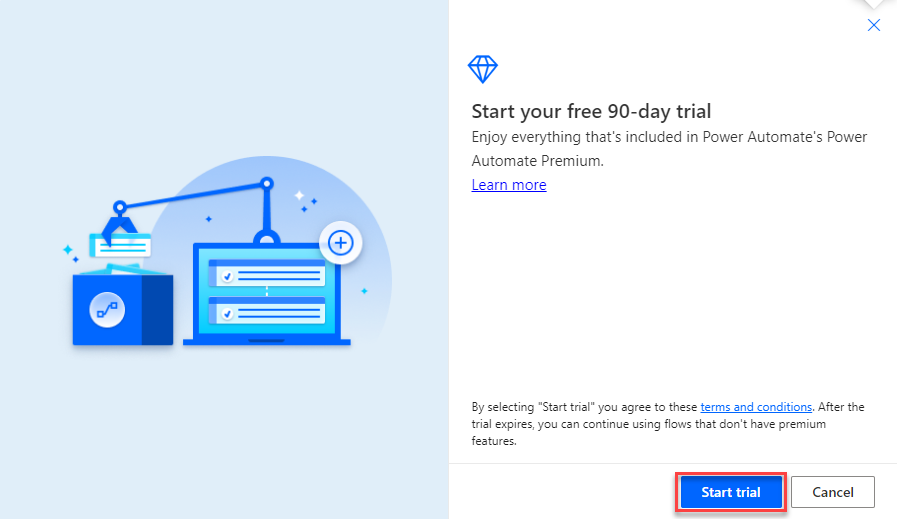
- Click on Save after adding the http-action.
When there’s no Power Automate license available, you will get a pop-up message to upgrade your license. Click on Sign up for a free 90-day trial:
Then click on Start trial to get a Power Automate Plan 2 trial license for 90 days.
Step 4: Parse the Access Token JSON response
To get the access token, we need to parse the JSON response from the HTTP action. We will use the Parse JSON action to do this. To parse the JSON response, we need to know the schema of the JSON response. We can get the schema by sending a test request to the URI and copying the JSON response.
- Save the flow.
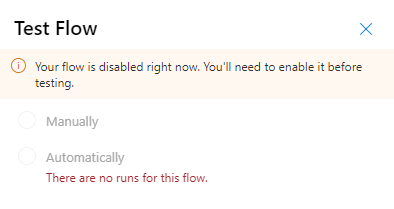
Click on Test, select Manually and click Test and Run Flow to send a test request to the URI.

When you run the flow for the first time after starting the trial, you will get a pop-up message that the flow is disabled.
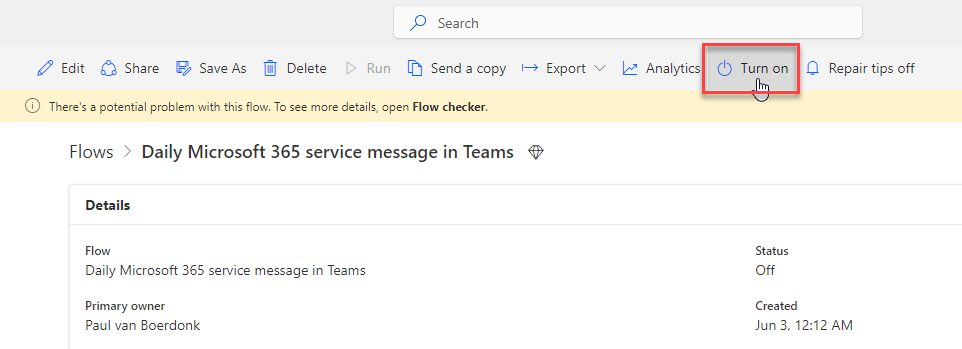
Close the flow by clicking ← in the top left corner and turn the flow on by clicking on the Turn on button.
{start=”3”}
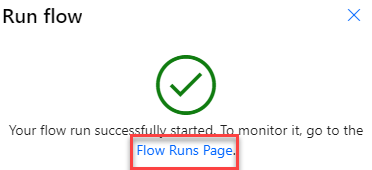
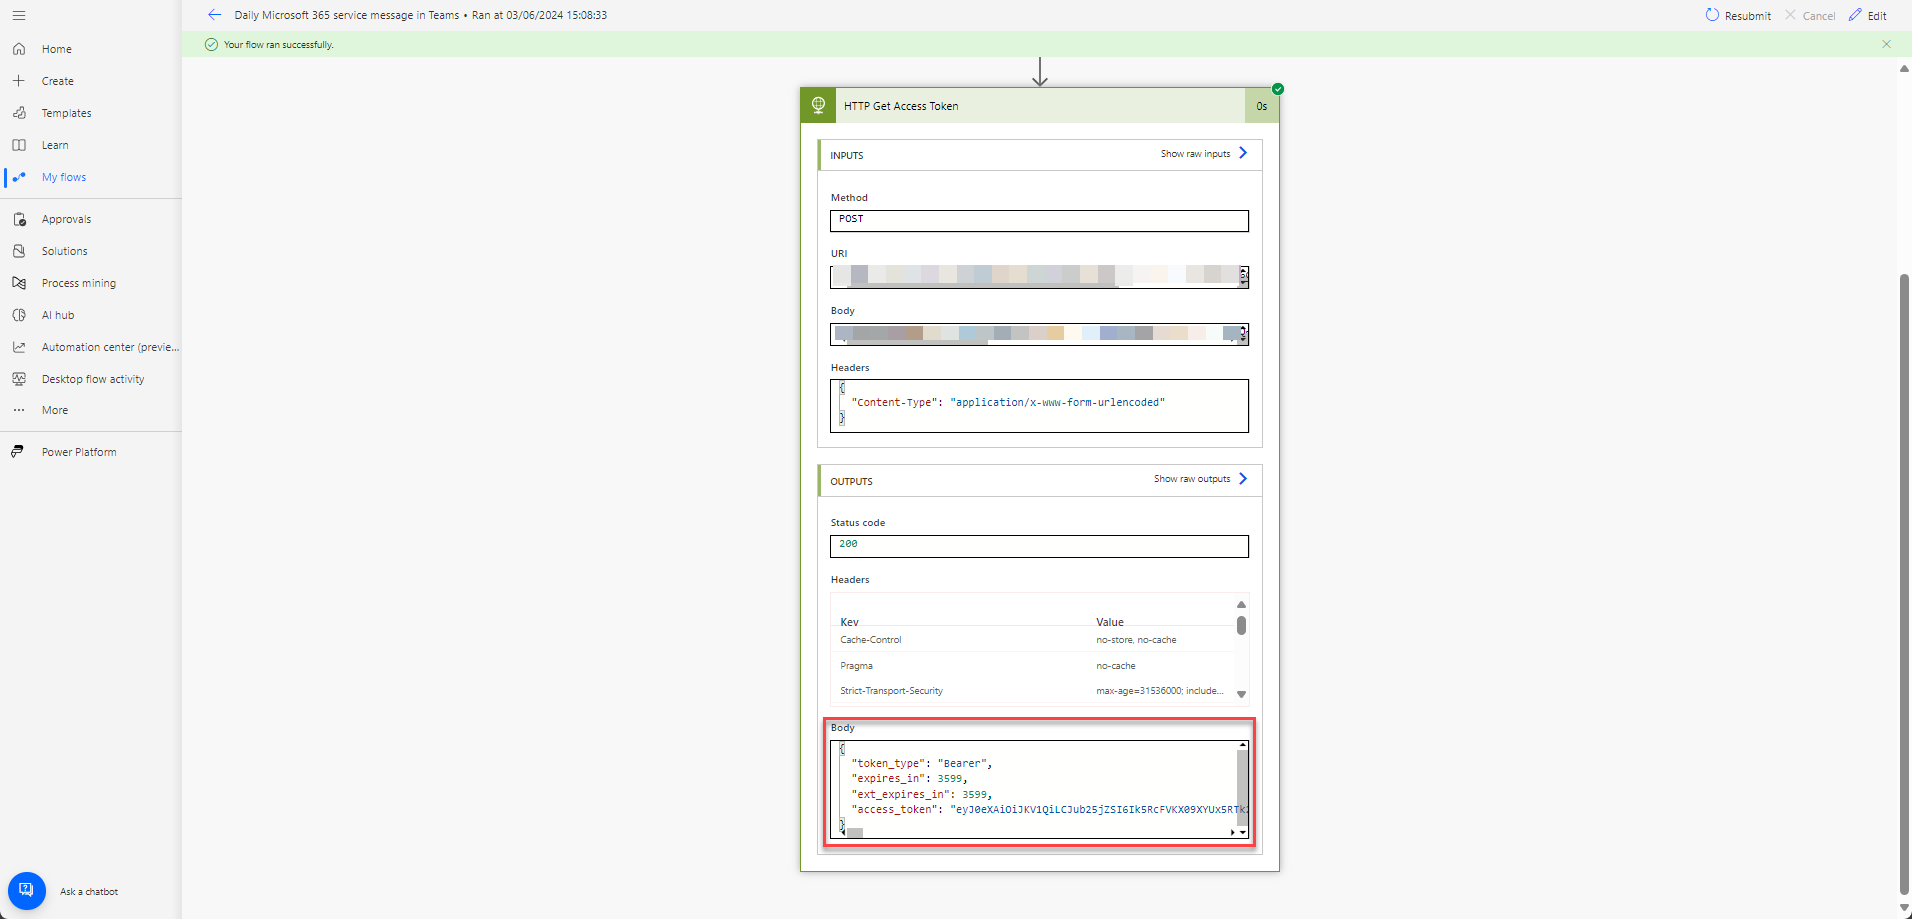
Go to the Flow Runs Page by clicking the link and open the latest run.
Click on the HTTP action to see the details of the action and copy the JSON response from the Body to your clipboard.
- Click on Edit to go back to the flow.
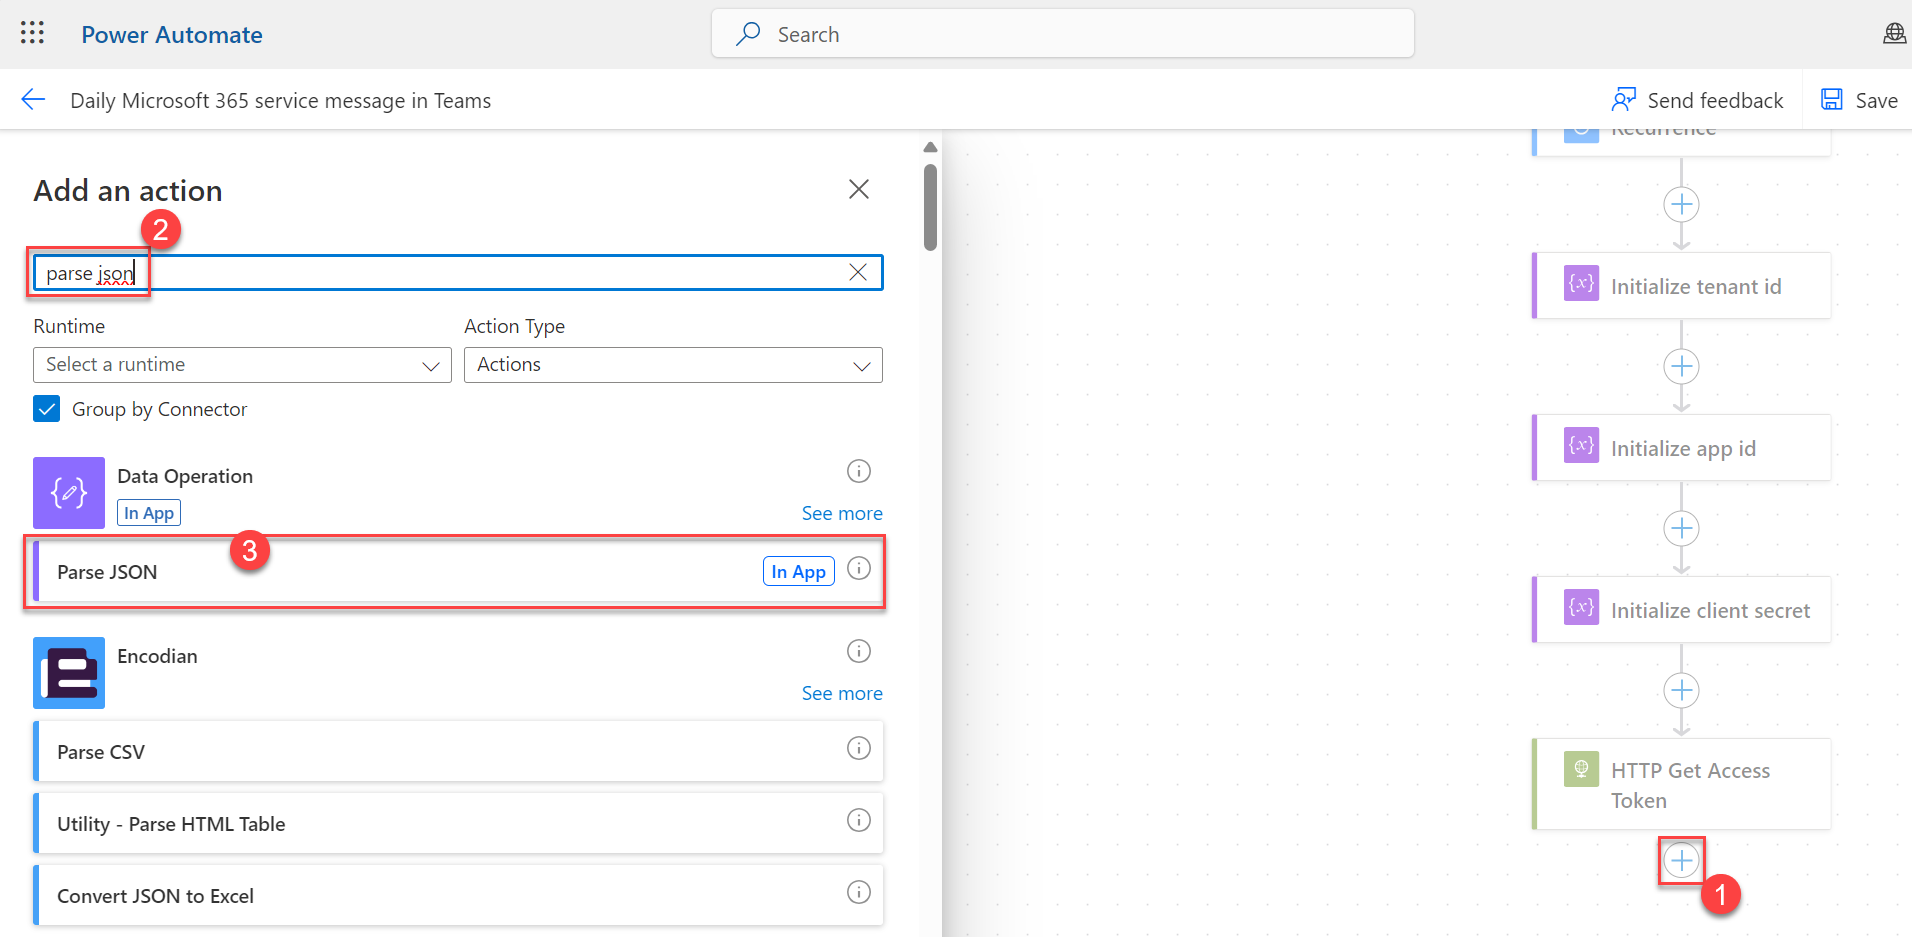
- Add an action below the HTTP action by clicking on the + icon.
Search for parse json and select Parse JSON.
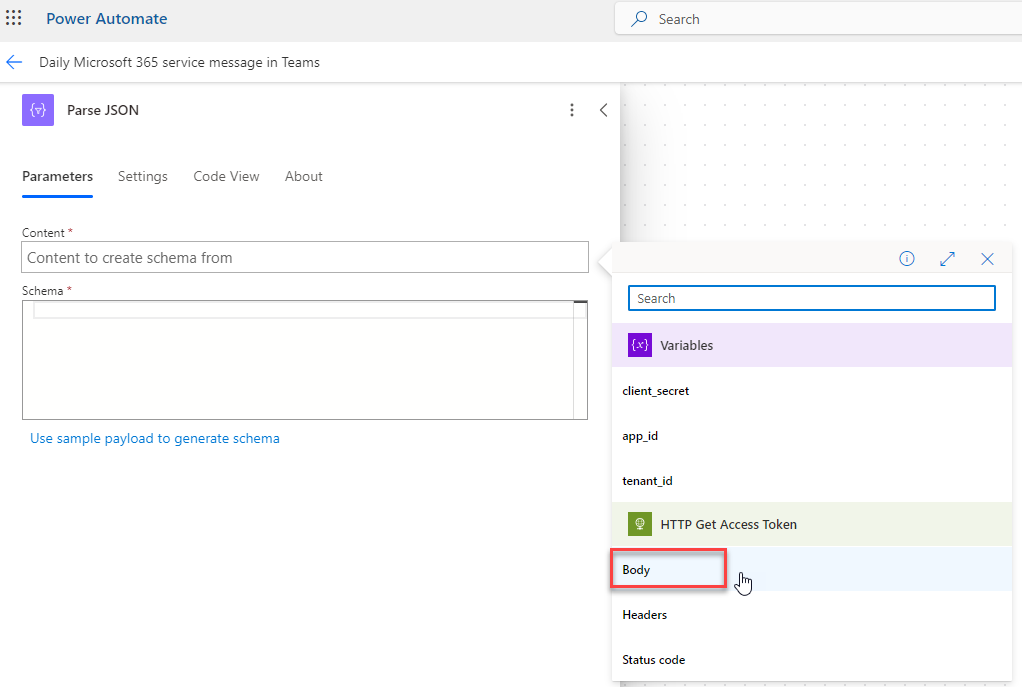
Click on the lightning bolt icon in the Content field and select Body from the HTTP action.
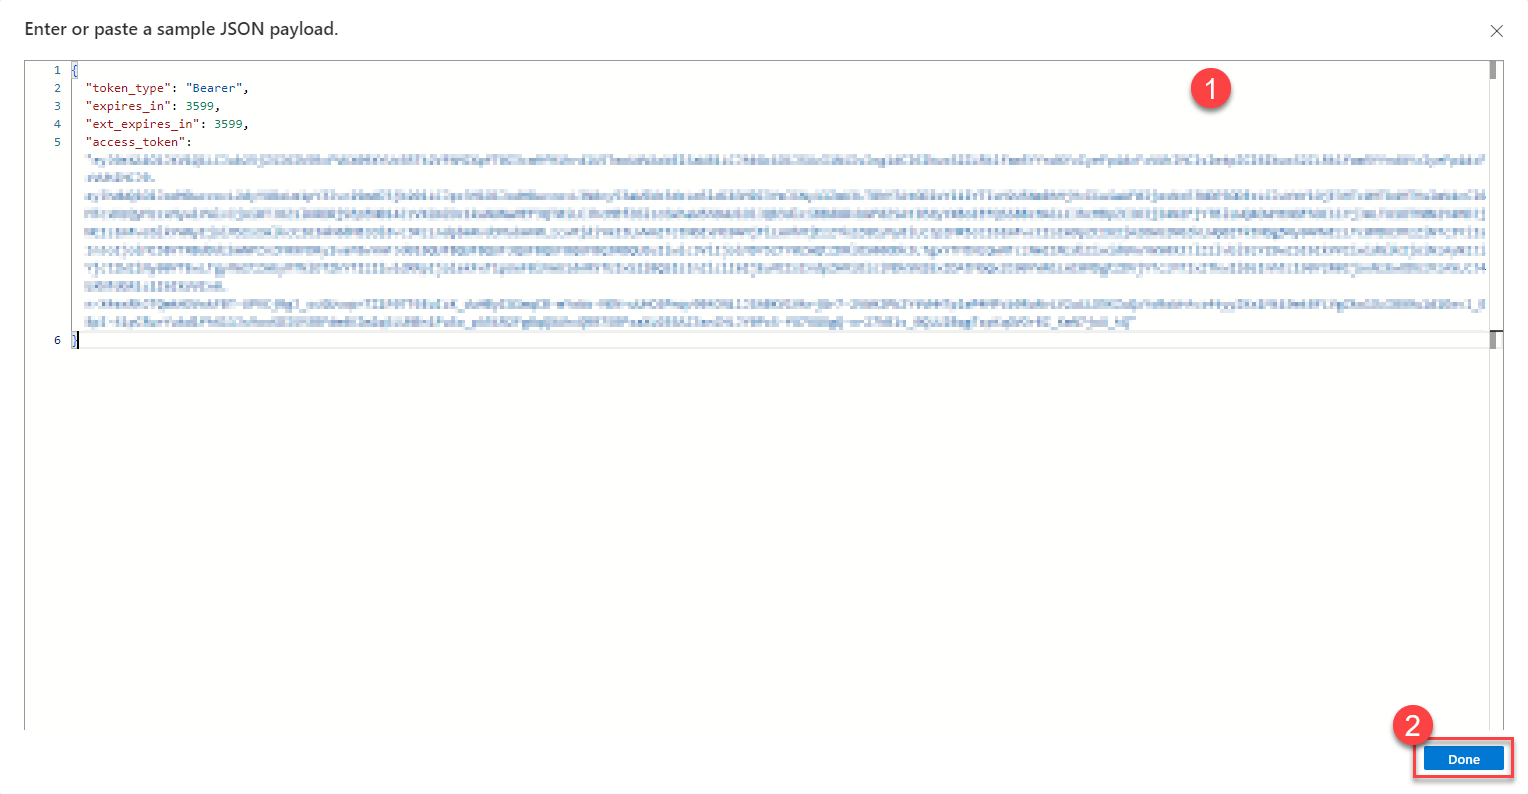
Click on Use sample payload to generate schema and paste the JSON response from the HTTP action. Click on Done.
This is how the Parse JSON action should look like:
1
2
3
4
5
6
7
8
9
10
11
12
13
14
15
16
17
{
    "type": "object",
    "properties": {
        "token_type": {
            "type": "string"
        },
        "expires_in": {
            "type": "integer"
        },
        "ext_expires_in": {
            "type": "integer"
        },
        "access_token": {
            "type": "string"
        }
    }
}
Step 5: Get the service announcements
Now that we have the access token, we can use it to get the service announcements from the Microsoft Graph API. We will use the HTTP action to get the service announcements.
- Add an action below the Parse JSON action by clicking on the + icon.
Search for HTTP and select HTTP.

Enter the following information:
- Uri:
https://graph.microsoft.com/v1.0/admin/serviceAnnouncement/messages - Method:
GET - Headers:
- Authorization:
Bearer @{body('Parse_JSON')?['access_token']}
- Authorization:
- Queries:
- $select:
id,category,severity,tags,title,category,startdatetime,enddatetime,services,details,body - $orderby:
startDateTime desc
- $select:
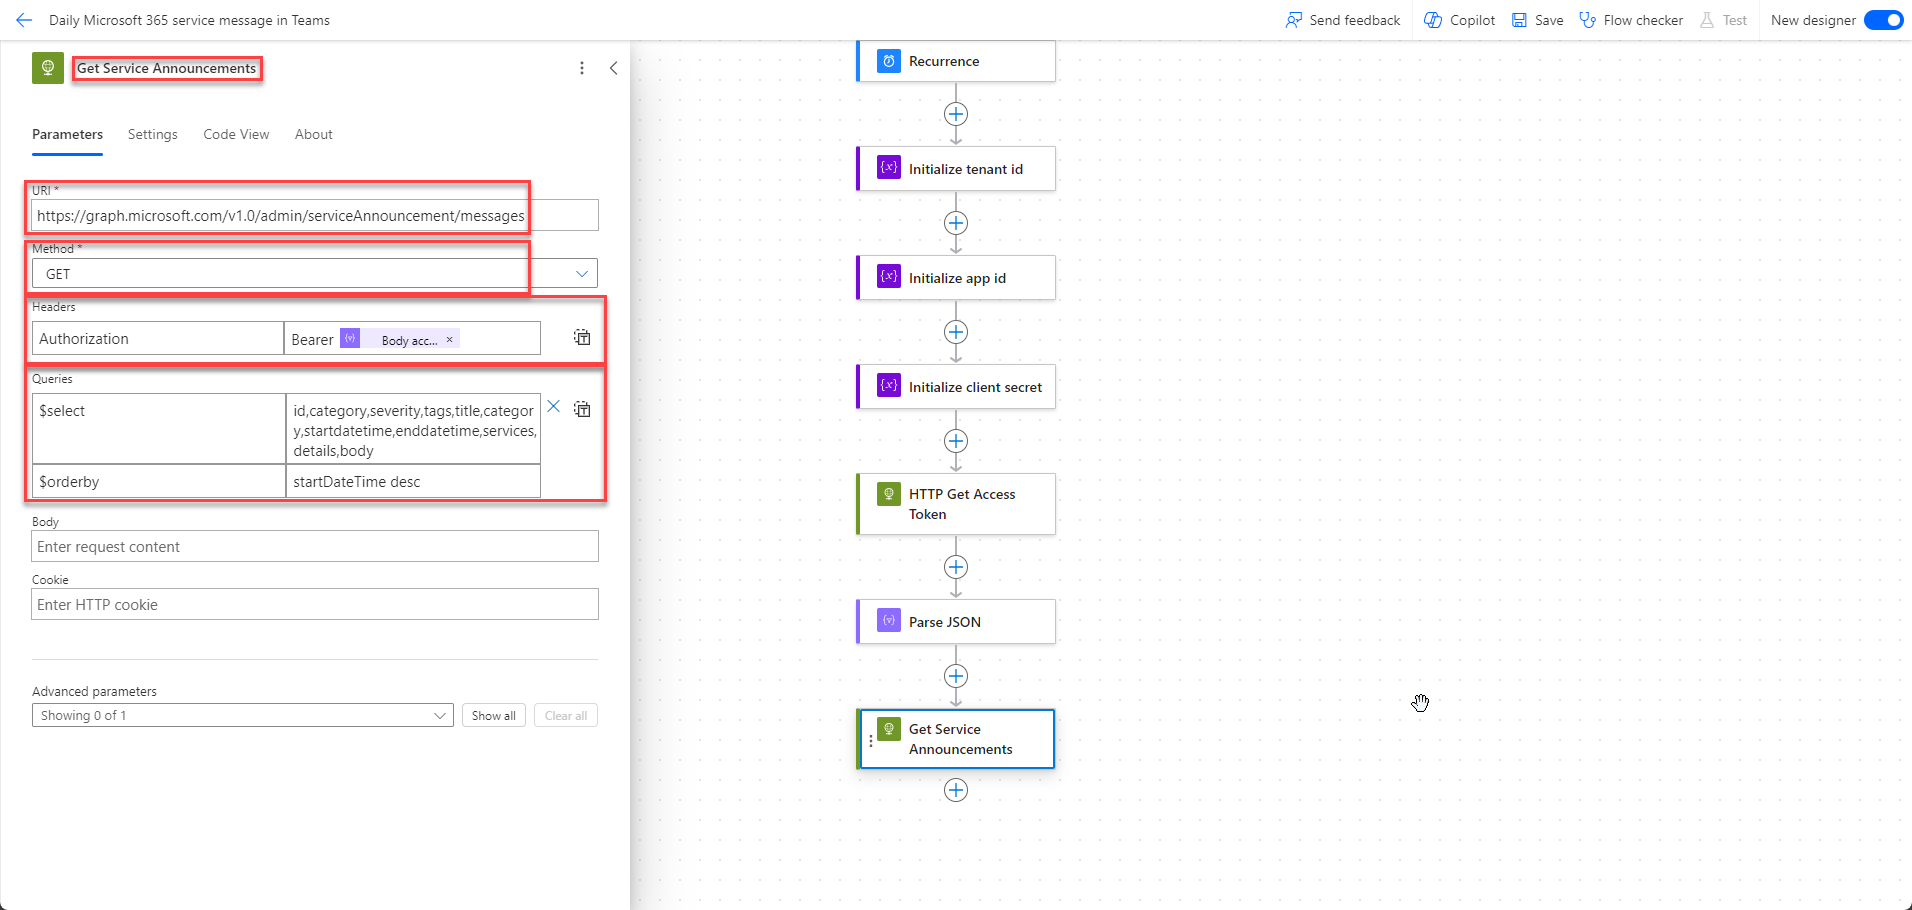
- Uri:
We will add the $filter query parameter to filter the service announcements by the startDateTime in the next step, because we need a filled JSON to generate the schema for the Parse JSON action.
Step 6: Parse the Service Announcements JSON response
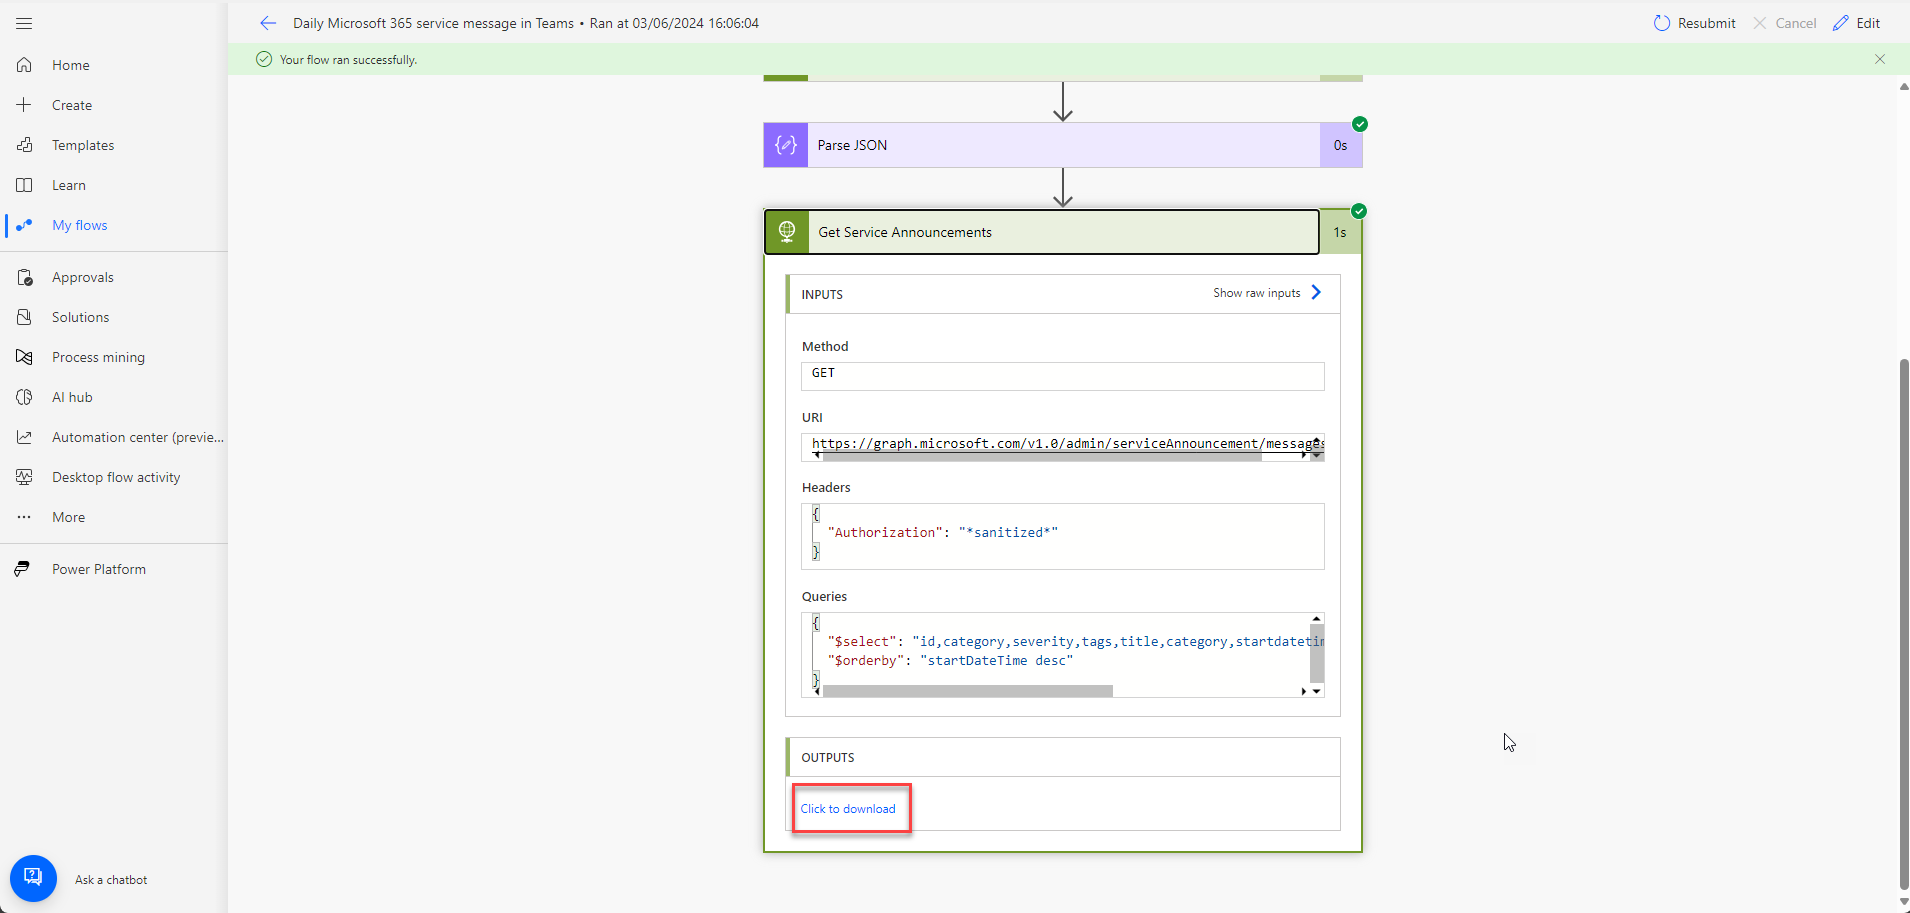
- Save the flow and Test it to get the service announcements.
- Go to the Flow Runs Page by clicking the link and open the latest run.
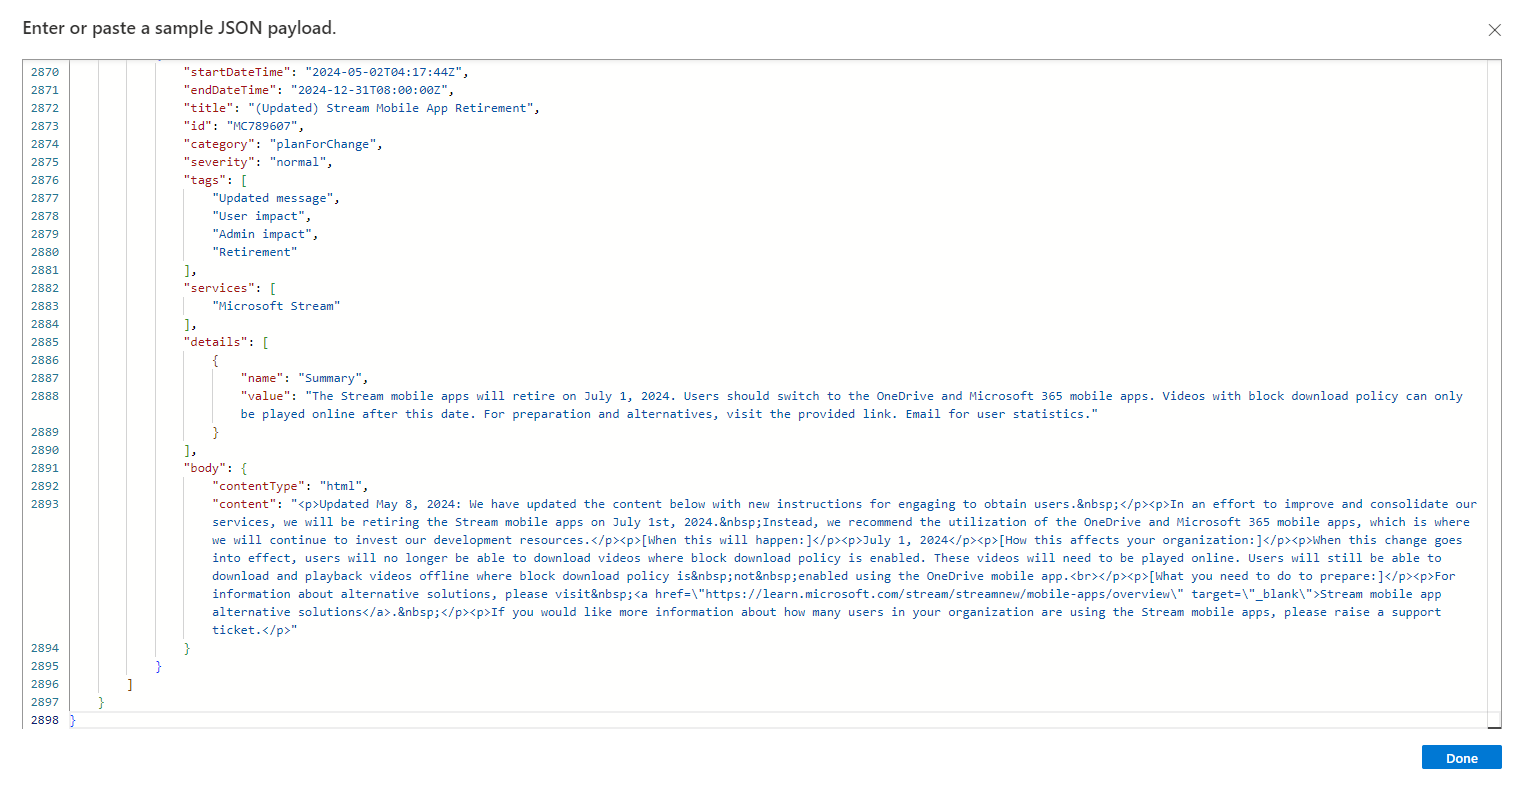
- Click on the HTTP-action Get Service Announcements to see the details of the action and download the JSON response from the Outputs, copy the file to your clipboard.
- Click on Edit to go back to the flow.
- Add an action below the Get Service Announcements action by clicking on the + icon.
Search for parse json and select Parse JSON.
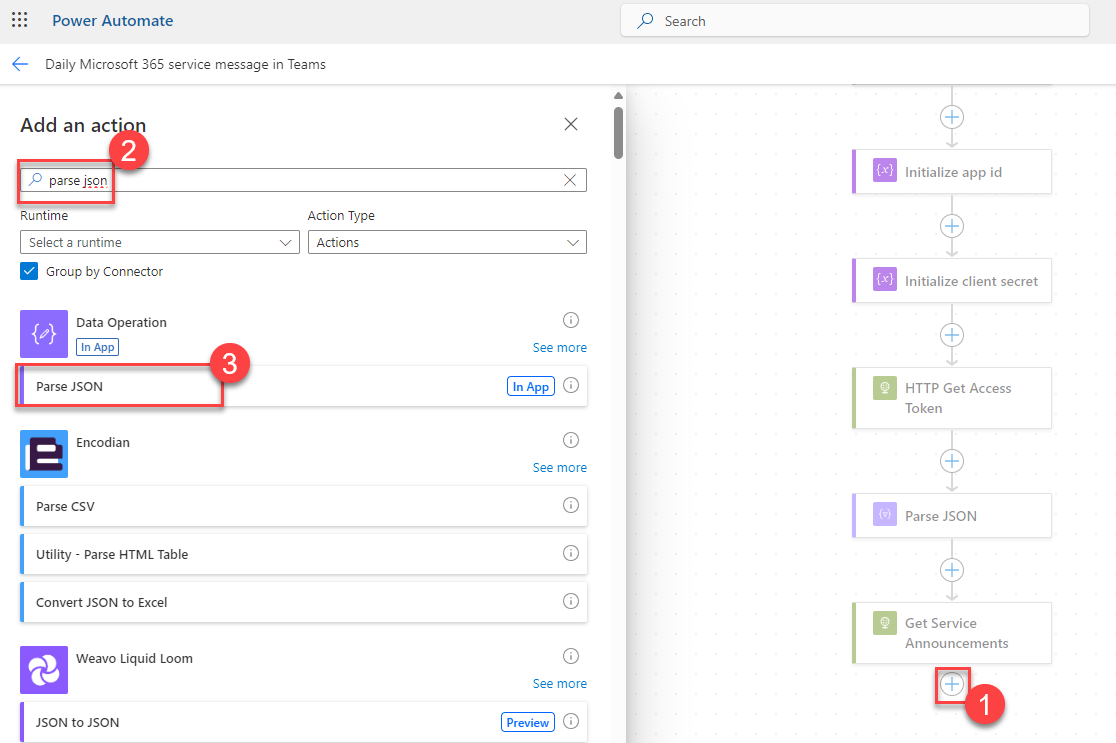
Click on the lightning bolt icon in the Content field and select Body from the Get Service Announcements action.
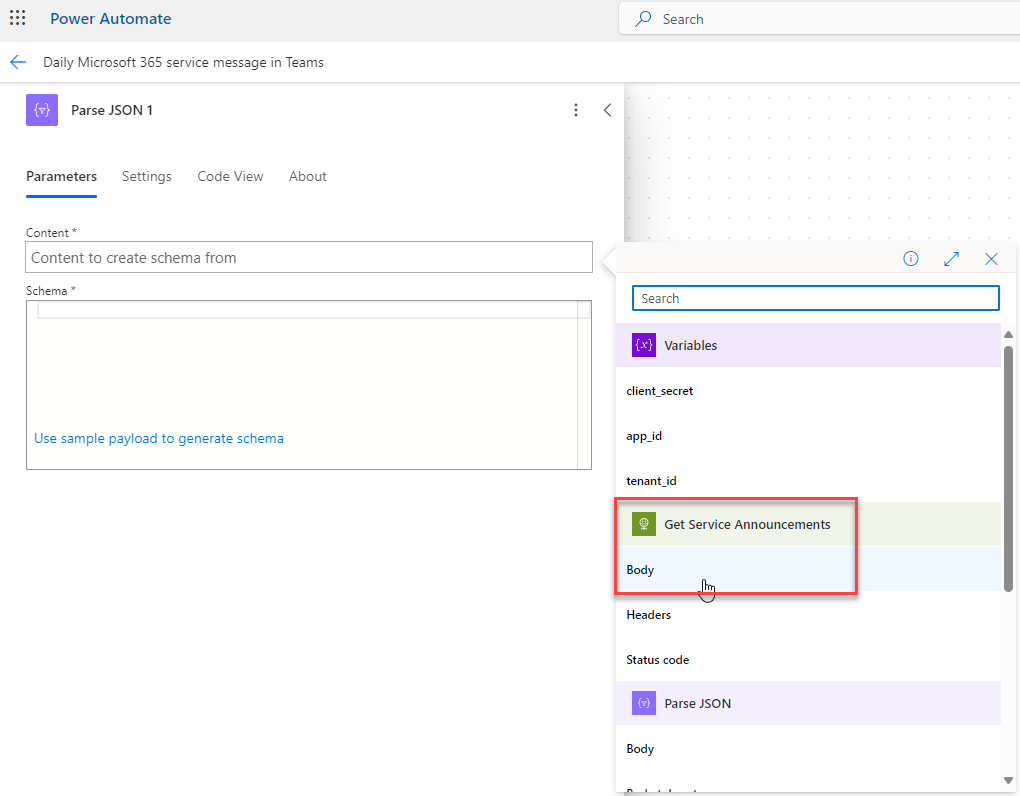
Click on Use sample payload to generate schema and paste the JSON response from the Get Service Announcements action. Click on Done.
This is how the Parse JSON action should look like: 
Step 7: Filter the service announcements
Now that we have the schema for the service announcements, we can filter the service announcements by the startDateTime. We will use the Filter array action to do this.
- Open the Get Service Announcements action.
- Under Queries, add the following query parameter:
- $filter:
startDateTime ge @{formatDateTime(utcNow(), 'yyyy-MM-dd')}

- $filter:
- Leave the rest of the action as it is.
Step 8: Select neccessary columns and create a HTML table
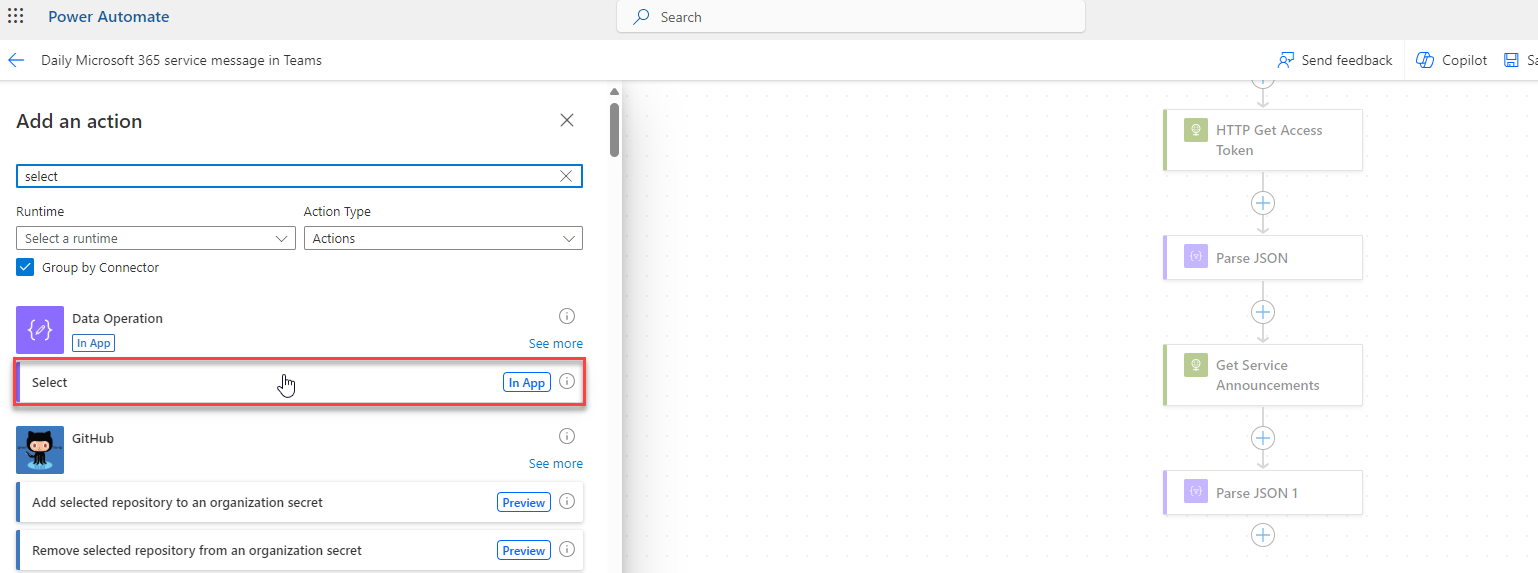
- Add a new action by clicking on the + icon.
Search for Select and select Select.
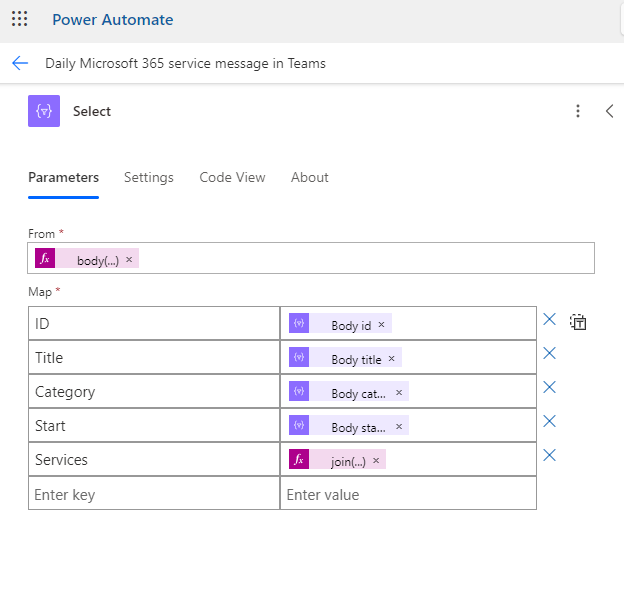
- Click on the From field and select
value.
There’s a bug in Power Automate that doesn’t show value in the From field-selector. By selecting Body value, you get a “NULL” output value. This is because we need to select “@body(‘Parse_JSON_1’)?[‘value’]”, instead of “@body(‘Parse_JSON_1’)?[‘body’]?[‘value’]”. You need to copy paste this value in the From field:
@body('Parse_JSON_1')?['value'].
- Click on Map and enter the following information:
| Name | Value |
|---|---|
| ID | @item()?['id'] |
| Title | @item()?['title'] |
| Category | @item()?['category'] |
| Start | @item()?['startDateTime'] |
| Services | @join(item()?['services'],', ') |
{start=”5”}
It should look like this:
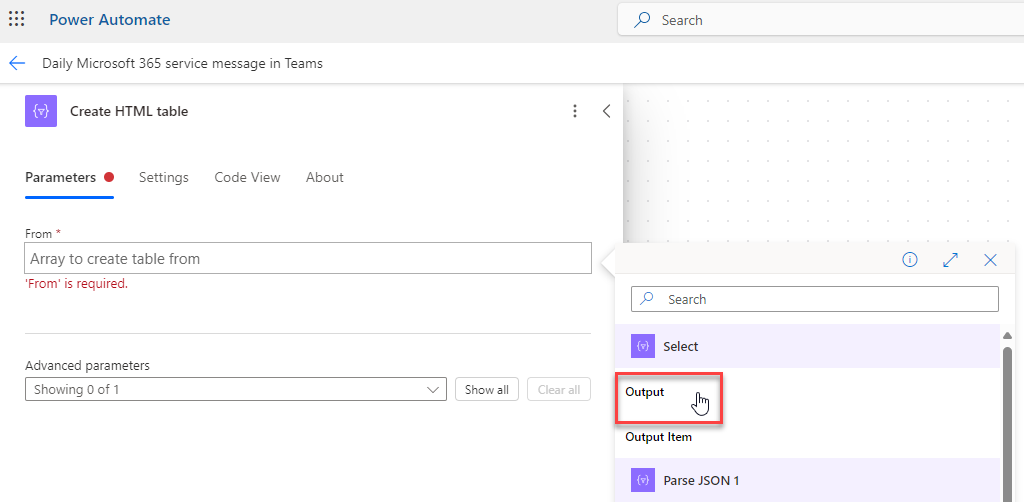
- Add a new action by clicking on the + icon.
Search for Create HTML table and select Create HTML table.
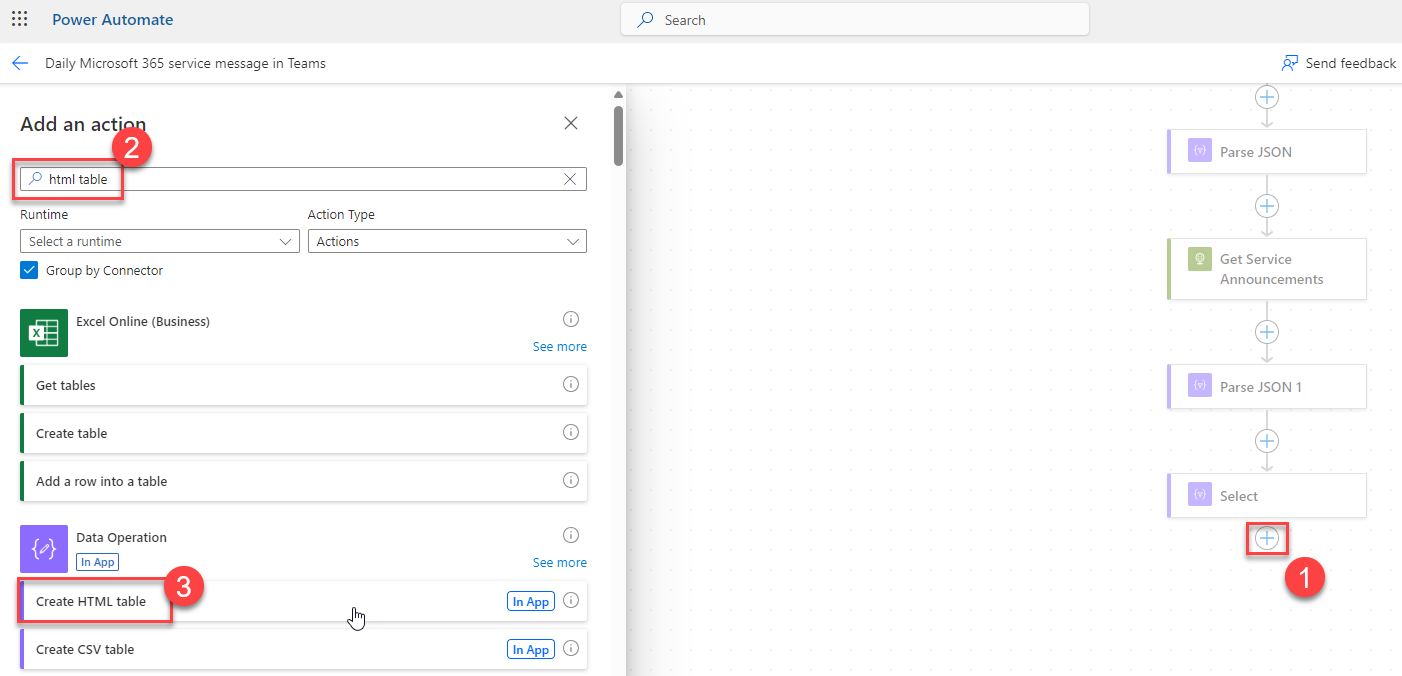
- Click on the From field and select Output from the Select action. Leave the rest of the action as it is.
Step 9: Send the service announcements to a Teams chat
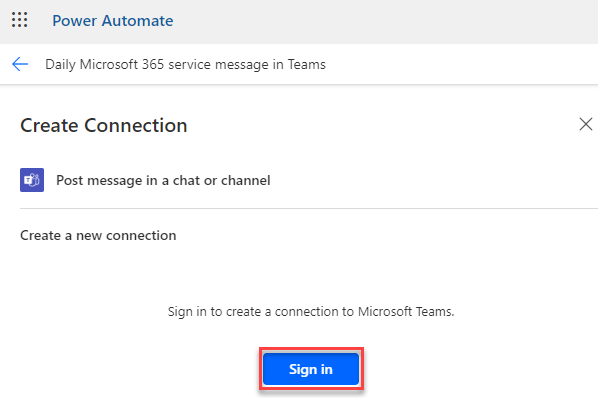
- Add a new action by clicking on the + icon.
Search for teams chat and select Post message in a chat or channel.
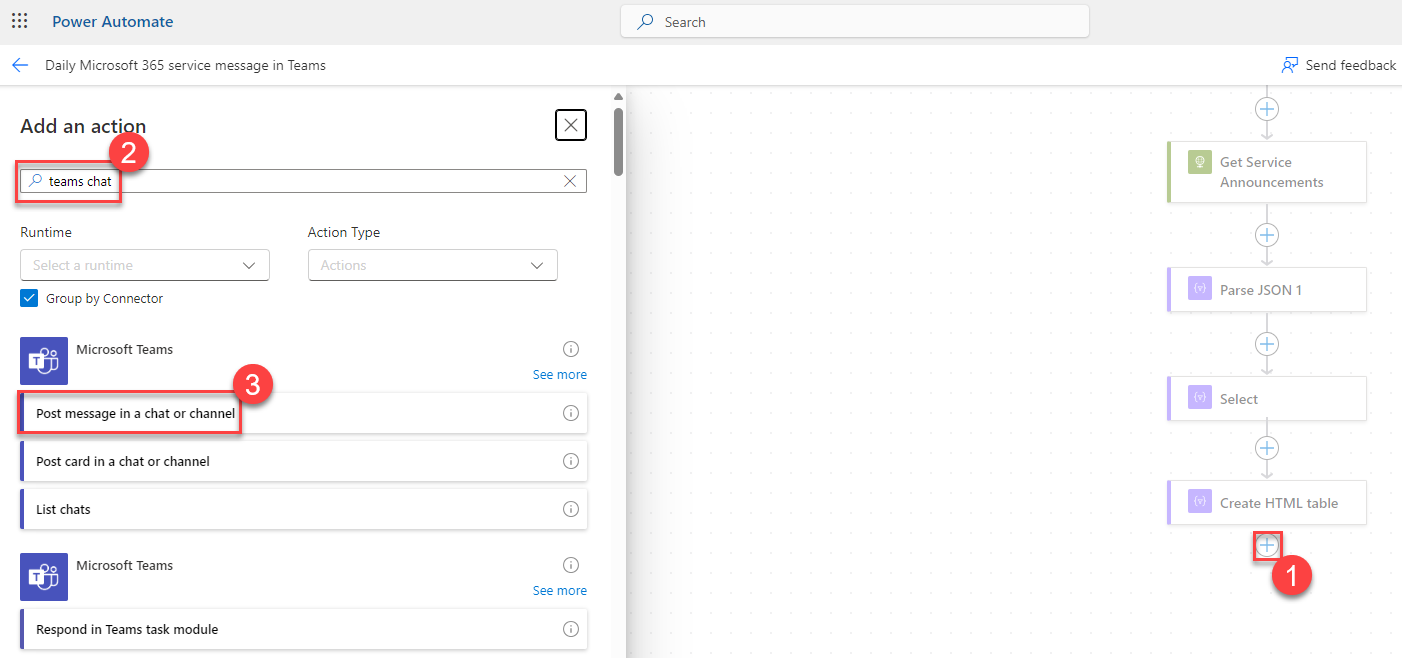
Click on Sign in and sign in with your Teams account to create the connection to Microsoft Teams.
- Fill in the following information:
- Post as:
Flow bot - Post In:
Chat with Flow bot - Recipient:
Your own email address - Message:
@{outputs('Create_HTML_table')}
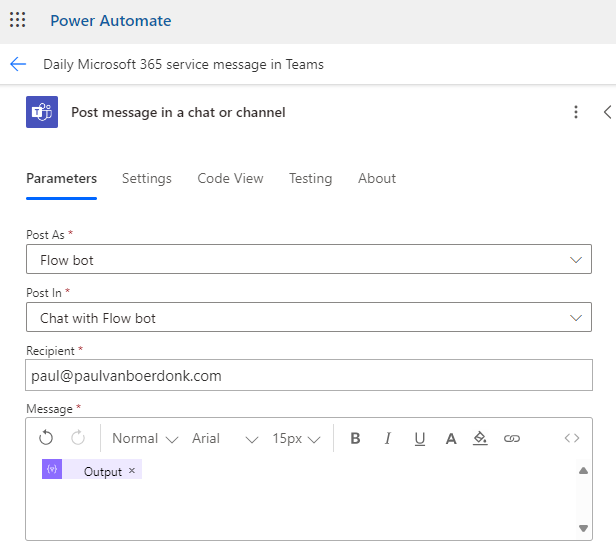
- Post as:
Step 10: Save and test the flow
- Save the flow.
Click on Test and select Manually and click Test and Run Flow to test the flow. You should see only green checkmarks if everything is configured correctly:
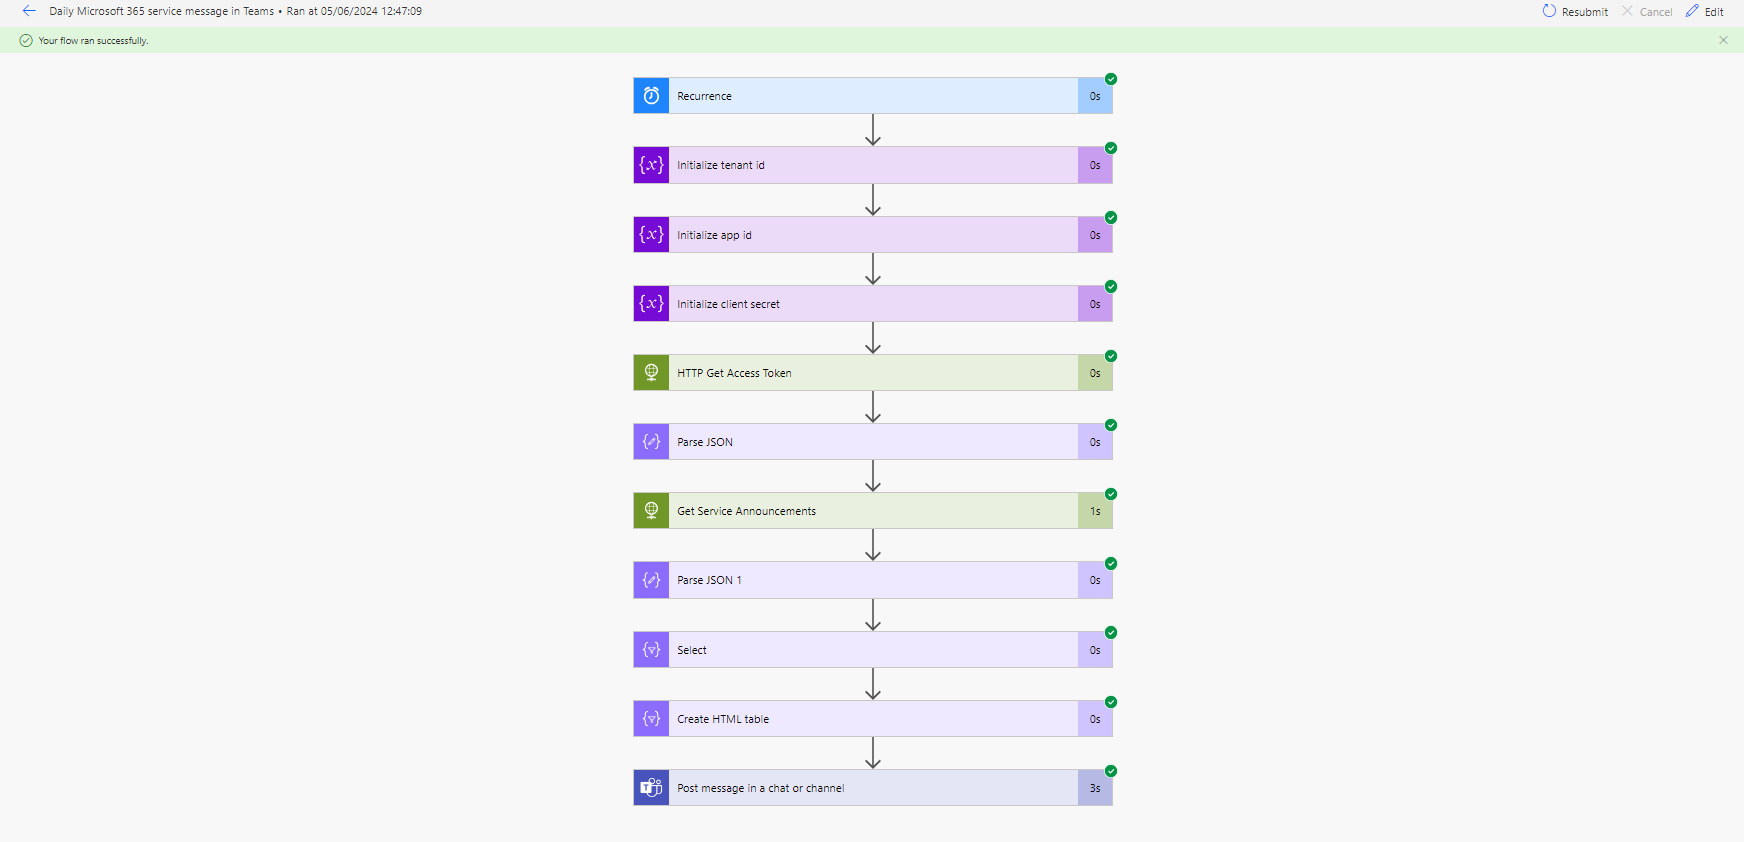
You should now receive a message in your Teams chat with the service announcements from your test.
Conclusion
Congratulations, you have successfully created a flow to receive Microsoft 365 Service Announcements in Teams using Power Automate!
This was only an idea of how you can use Power Automate, combined with the Microsoft Graph API, to automate tasks. You can now customize the flow to fit your needs, for example, by adding a condition to only send the service announcements if there are any new announcements.
I know this was a long post, but I hope you enjoyed it. If you have any questions or feedback, feel free to leave a comment below. I would love to hear from you!